Review Who Has Access to Your Private Data on iPhone & iPad

Want to find out which of your contacts or apps has access to your private data? There is a handy iPhone security check feature that allows you to review all of your contacts and apps, and revoke access to private information, such as your location, photos, Bluetooth, and more. Find out how to run a security check on iPhone below.
Why You’ll Love This Tip
- Check which of your contacts has access to private data like location or photos.
- Revoke privacy access from apps that you don’t want tracking your location or other information.
- Remove devices linked to your account that you aren't using any more.
How to Run a Security Check on iPhone
System Requirements
This tip works on iPhones running iOS 17 or later, and was tested on an iPhone 17 Pro running iOS 26. Find out how to update to the latest version of iOS.
The iPhone security checkup feature allows you to quickly review all of your contacts and see who has access to what. Then, you’ll be able to go over all your apps and see what privacy-related data they have access to. Throughout the process, you’ll be able to revoke access with a simple tap. Here’s how to run a security check on iPhone:
- Open the Settings app, and select Privacy & Security.

- Scroll down, and tap Safety Check.

- Tap Manage Sharing & Access. Your iPhone will use Face ID or require your passcode to proceed.

- You’ll be presented with an overview of how this process works. Note that at any time during this process, you can tap Quick Exit to immediately close the Settings app.

- Once you’ve finished reading the explanation, tap Continue.

- In the People tab, tap a person, then tap Review Sharing.

- Instead of going through person by person, you can also tap the Information tab.

- In the information tab, select from one of the options to review who has access to this data. For example, you can tap Location and then select Review Sharing.

- You will then see a list of people with whom you are sharing this data. Select the person and tap Stop Sharing if you do not want them to have access to this information. You can also tap Select All & Stop Sharing to stop sharing information with everyone in the list.

- If everything looks good, tap Skip.

- Once you are done, you will have completed Step 1. You can tap Continue to move on to Step 2 or tap Review More People if there are other contacts you want to stop sharing data with.

- In Step 2, you will be able to review apps. Select an app, and tap Stop App Access.

- You can also tap the information icon to check which data the app has access to.

- Here, you can select what information for which you want to remove access and tap Stop App Access.

- Instead of reviewing each app individually, you can tap the Information tab.

- In the Information tab, you can tap any of the privacy-related data for which you want to revoke access. For example, if you tap Location and then select Stop App Access, it will remove location permissions from every app that is currently accessing it.

- If you don’t want to remove every app’s permission, tap the information icon.

- You can then select from the list of apps for which you want to stop access, or tap Select All & Stop Access.

- If you are satisfied with your current app permissions, you can tap Skip.

- After completing Step 2, you can tap Continue to move on to Step 3 or select Review More Apps if you want to continue removing apps.

- In Step 3, you can review your current emergency contacts. Tap the minus icon to remove them, or tap Add Emergency Contact to add a new one.

- Tap Continue.

- Next, you can tap the bubble next to any of the devices listed, then tap Remove Selected Devices. Tap Skip if you don't want to remove any devices.

- Next, you have the option to Update Apple Account Password or Update Later in Settings.

- Then, Update Passcode or Update Later in Settings.

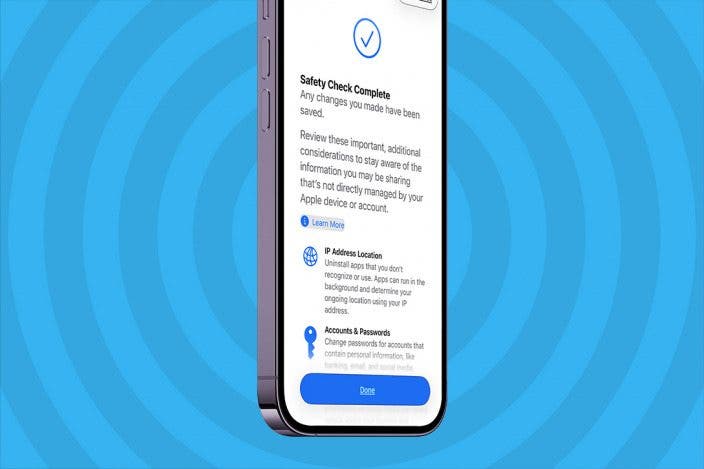
- Now, your Safety Check is complete, and you can tap Done.

- There is a list of several other settings you may want to check on this page, as well. Scroll down to see all settings.

Now you know how to do a Safety Check on iPhone and iPad. Next, find out how to do an Emergency Reset on your iPhone using Safety Check. Be sure to check out our free Tip of the Day for more great security tutorials.

Every day, we send useful tips with screenshots and step-by-step instructions to over 600,000 subscribers for free. You'll be surprised what your Apple devices can really do.

Rhett Intriago
Rhett Intriago is a Feature Writer at iPhone Life, offering his expertise in all things iPhone, Apple Watch, and AirPods. He enjoys writing on topics related to maintaining privacy in a digital world, as well as iPhone security. He’s been a tech enthusiast all his life, with experiences ranging from jailbreaking his iPhone to building his own gaming PC.
Despite his disdain for the beach, Rhett is based in Florida. In his free time, he enjoys playing the latest games, spoiling his cats, or discovering new places with his wife, Kyla.
Related Articles
 Olena Kagui
 Leanne Hays
 Devala Rees
 Rhett Intriago
 Rachel Needell
 Amy Spitzfaden Both

Everything Announced at Apple's 2024 WWDC Keynote


 Ashleigh Page